Showing posts with label nodemcu. Show all posts

Monday, October 10, 2016

ATM90E26 + ESP8266 Energy Monitoring

Before I commit a design to a PCB, I usually make a messy jumpers everywhere version on a breadboard. This is not always possible for a full complex design, often sections get committed to PCB and then modules find a home on the overall breadboard prototype.

This has been the fate of my ATM90E26 Breakout. I plan to eventually make it into a single board /accurate wifi enabled Energy Monitor. For now it is living next to a NodeMCU on a breadboard. The ATM90E26 has the flexibility to be accessed both over SPI and UART. However the SPI mode it supports is only Mode 3, which is an unsupported mode of the ESP8266 Arduino stack. So I ported my ATM90E26 Arduino interface code over to UART mode with CRC check and everything worked okay after a few days of head scratching. You can find it on the UART branch in github.

I would like to build a self-powered energy monitor, so I pulled out a venerable 7805 and added it to a half-wave rectifier from the 12V AC-AC transformer used for voltage waveform sampling. When I was using a full-wave rectifier in the past the overall DC voltage was too much for thr 7805 to regulate without a heatsink, however with the 1/2 wave version, the diode takes care of dropping half of the voltage leaving the 7805 functional without a massive heatsink.

I calibrated the set-up with some magic multipliers found using the datasheet, maths and my 116W calibration lamp and it all works like a charm as shown in the video below.

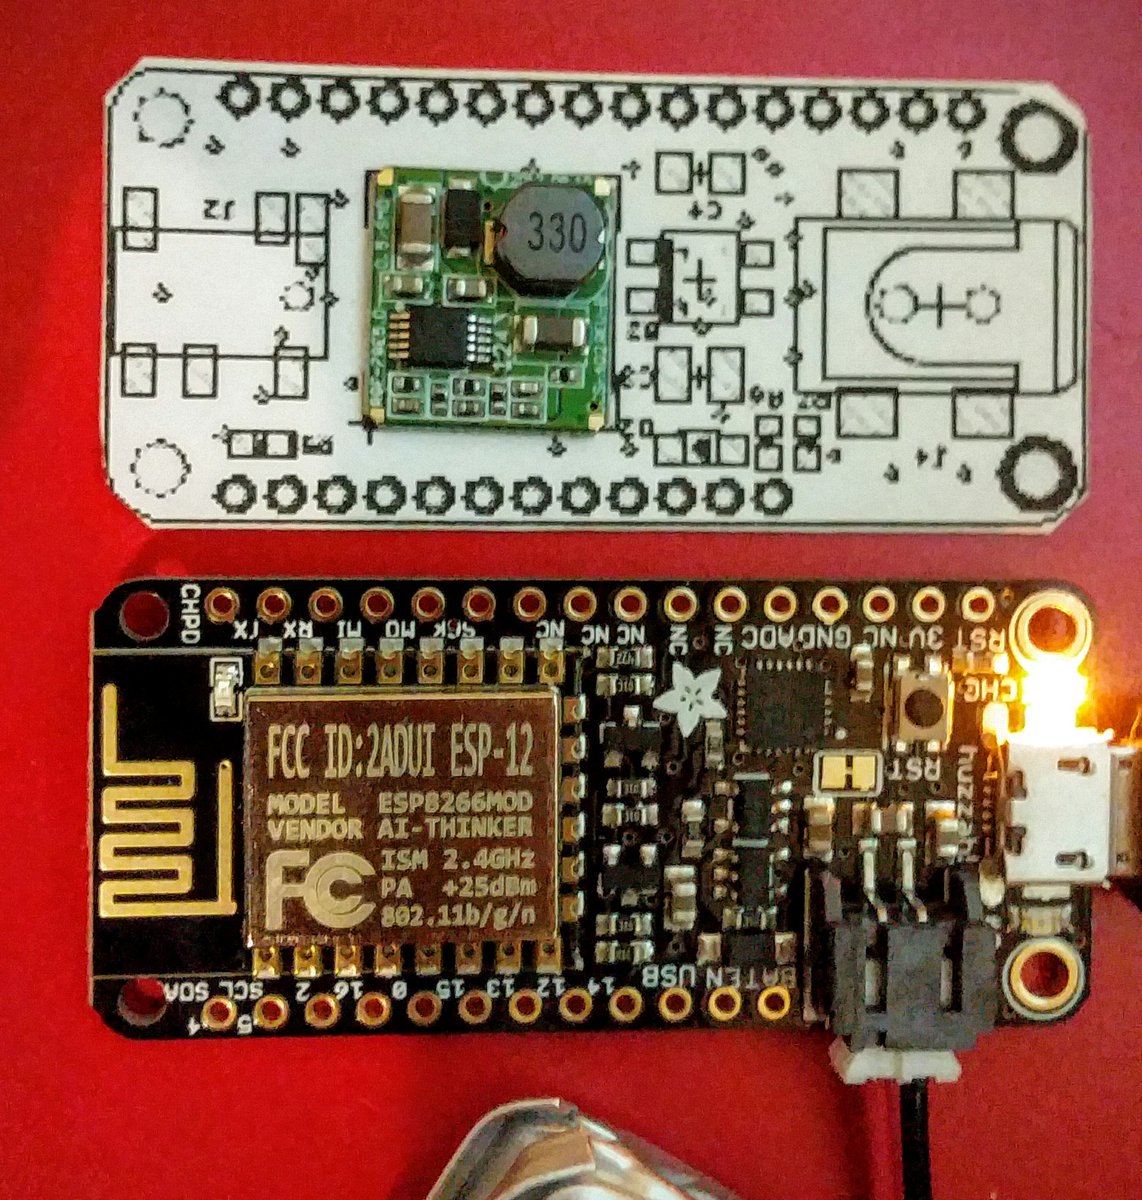
There seems to be some noise leakage onto the UART when AC signals are applied, I will attempt to rectify this with an optoisolator. However a simple reboot of the ESP8266 platform seems to quickly fix any software serial communication issues. Meanwhile I am putting it all together into a featherwing form factor for PCB manufacture.

Wednesday, January 20, 2016

Extending Energy monitoring - ADS1115 Grove module and ADS1115 Featherwing


After selling a few kits and populated boards of the NodeMCU Energy Monitor on Tindie, I started receiving feedback from people in the real world using my design. One of the main requests was the ability to support more channels, the other was miniaturisation suitable for fitting in 1 or 2 unit DIN Rail enclosures.

I addressed the request for channels by developing my own energy monitoring specific ADS1115 breakout. In addition to the core IC it includes 3.5mm stereo sockets for connecting the popular YHDC CT sensor and a couple of Grove connectors for chaining multiple boards together. Using this mechanism and the core NodeMCU energy monitor, one can monitor upto 7 current channels.

The issue of miniaturization is adressed by choosing a smaller form factor and feature rich ESP8266 breakout, namely the Adafruit feather. As a side effect we gain access to all the other boards using the feather form factor and all the other stackable featherwings.

During the design of the Energy Monitor Featherwing I integrated the ADS1115 onto the same board instead of using a breakout  (switched to 0603 parts to make it more compact) and used an SMD version of the Recom 5V Buck converter.

The featherwing can be mounted with stackable connectors under the Adafruit feather. Leaving the top free for display OLED for realtime power display or just weather or bitcoin prices vs energy usage.

Tuesday, November 3, 2015

The SeeedStudio ESP8266 Contest and resulting product on Tindie

A few weeks back I participated in the SeeedStudio ESP8266 project design contest with my NodeMCU based Energy Monitor. As in all popularity contests I had to ask my friends to help me out and vote for me as often as possible. I had the most views, but not the most votes. Still I ended up in the second place which I am quite happy with.
Fully assembled NodeMCU Energy Monitor - Sensors plug in at the bottom
With such encouragement I decided to get a PCB fabricated for my Energy Monitor project and put it up for sale on Tindie. This is my first electronics project for sale and apart from some local interest, I have made an export sale to the UK. Deciding how to put the project together for sale is quite new to me. I have a certain skill-set but other electronics enthusiasts may not share them. Should I just offer blank PCB's, which other's might as well get from OSHPark or DirtyPCB ? Should I offer a through-hole kit along with the PCB and take the interested party through the soldering order ? Should I put everything together as SMD in my oven and offer the kaboodle including NodeMCU and the rather expensive ADS1115 ? What about the current and voltage sensors ?
NodeMCU Energy Monitor "mostly" Through-hole Kit

There are also component and PCB sourcing issues as outlined in a previous post. Tindie offers some flexibility in this regard letting me set-up various tiers and options. My single product listing becomes effectively a stratified listing catering for buyers with multiple electronics proficiency levels. I might start offering the 100A clamp of current sensor and 12V transformers from YHDC as part of my kit, to make gathering of all the components easier. With bulk manufacture in SMD, cheap mass produced NodeMCU modules and knock-off ADS1115's I might be able to get the total cost down to USD20 unshipped. Which will put the design at par with these non-web connected versions of the same. The design will also be far cheaper than the custom web-connected offerings from Efergy and Wattcost, mainly because these consumer grade products also provide a data hosting service complete with apps and websites. The NodeMCU Energy Monitor leaves the user in charge of their own data and requires certain knowledge of IoT platforms to take full advantage of it. The number of players (AWS, Thingspeak, Bluemix etc.) in the IoT data hosting arena is increasing daily and I am sure people automating and sensorising their homes will appreciate the choice, rather than be locked in with the server hosted by the hardware vendor.

The remaining hurdle is of course shipping, it cost me about USD14 to ship 2 units to UK from Australia as small parcels. Where as China post shipping costs are minimal. Logistics - another hurdle holding back small scale production in Australia. The only long term sensible thing to do will be to manufacture in China and exploit the logistics there. All said and done I am pretty happy with my $50 sale, at least it has paid for the electrician who installed the energy monitor.
Fully installed NodeMCU Energy Monitor - Black YHDC transformer, current sensor inside the enclosure

Wednesday, September 9, 2015

Experimenting with Energy Monitors

After a spate of high electricity bills and trying to save energy by turning things off randomly I decided to do it the proper and scientific way by experimenting and collecting plenty of data.

In the days of bitcoin mining high energy bills were the norm. Now they miners have all moved to better homes and I am left with myriads of run of the mill appliances. Identifying the energy hungry beasts is not trivial.
Initial attempt at current measurement with DSO-Nano
The Open Energy monitor site has a plethora of ideas and some quite good Arduino and Raspberry Pi based designs for energy monitoring. SeeedStudio also has a couple of designs intended for energy monitoring use with an option to use an LCD or Oled screen, which I quite like. The downside of both these options however is the wireless component. The EmonTx option uses the RFM12/69 as the wireless transciever and the SeeedStudio option uses the nRF24L01+, both options require custom and expensive receiver hardware attached to an always on data-logging system.

Seeedstudio Energy monitor with nRF24
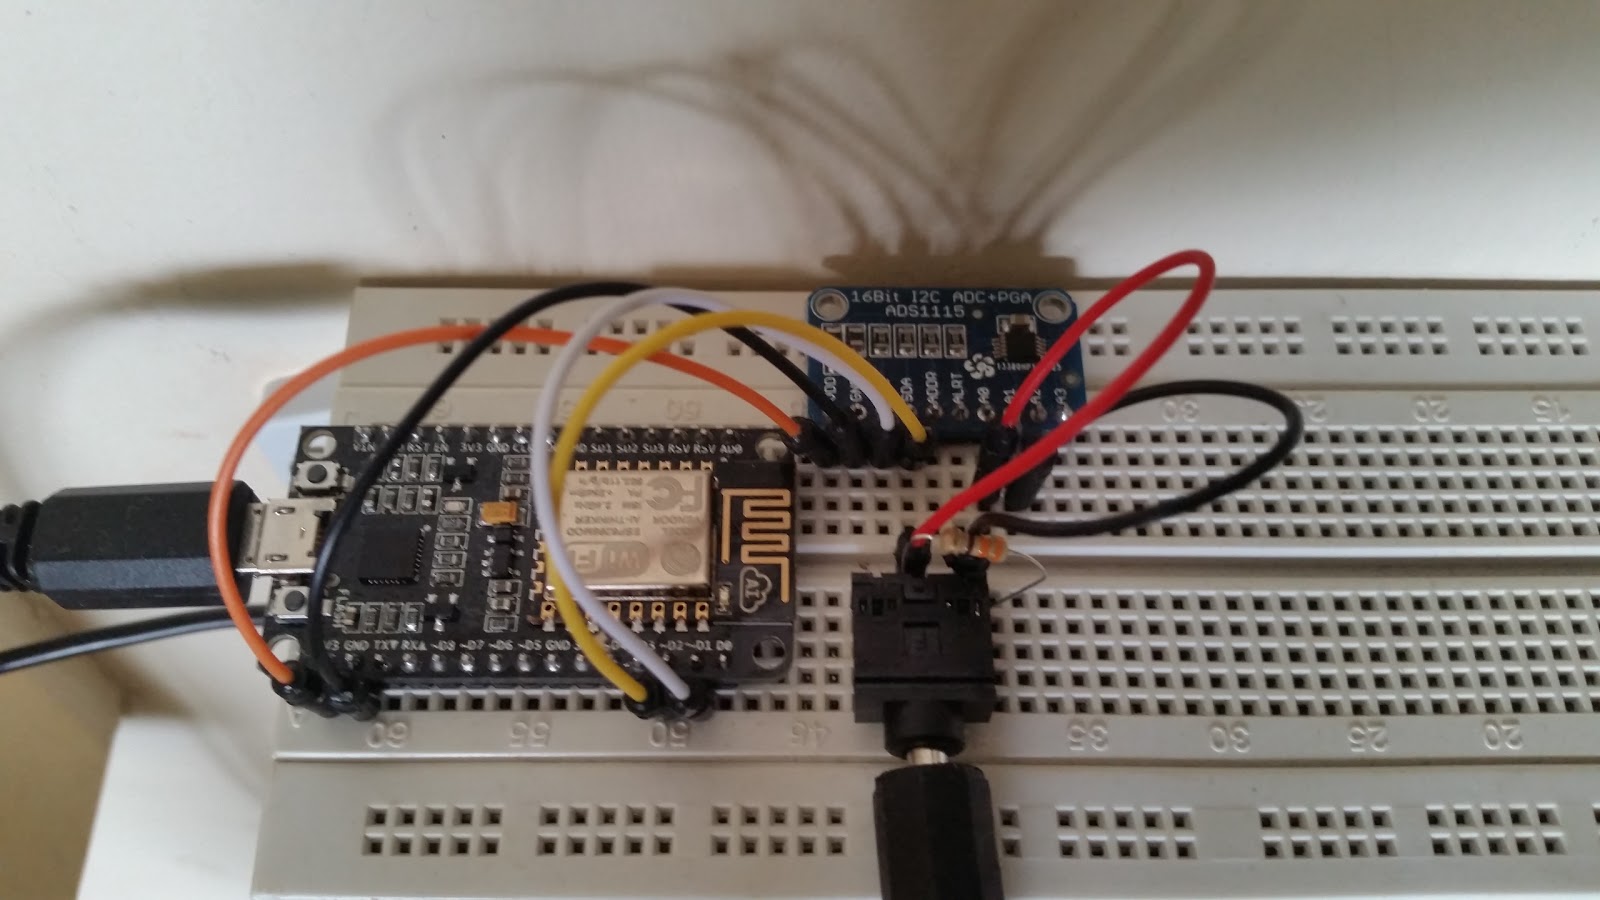
So after a bit of research I decided to roll my own on a breadboard using the ESP8266-12E based NodeMCU module. I started with a basic version is for apparent power only. To keep component count low and the circuit as simple as possible I used an ADS1115 breakout in differential mode eliminating the need for bias resistors. The hard part is getting a licensed electrician to wire up the clamp on current sensor to the main wire coming into the premises. Since we have only 1 channel we are going to monitor overall power rather than power per circuit.
Apparent power energy monitor with ESP8266
After the fact I made a Fritzing diagram showing how-to wire up the prototype on a breadboard. Powering the NodeMCU near the switchboard might be an issue as well, so I installed a DIN rail power socket, this will come in handy for real power measurement later on.
Fritzing diagram of apparent power energy monitor
One of the downsides of the ESP8266 approach however is the high current consumption (300mA or so) of the module and the fact that small block transformers used for voltage sensing will experience power factor shift under this load. This makes powering the system and measuring real power using the same transformer difficult, it can however be done with proper calibration.
NodeMCU Energy Monitor including power supply and voltage sensing
 The next bit is getting proper code to run on the NodeMCU. I chose to use the module in Arduino mode with the excellent work done here. For code inspiration I used Emonlib from the OpenEnergyMonitor project. I made some changes to read the current via the ADS1115 instead of directly via the inbuilt ADC, increased the integration period and patched in a square-root approximation method. The resulting code can be seen below.

The data from the monitor gets uploaded every 20seconds or so to Thingspeak. This makes it easy to plot graphs and analyse the data for appliance specific spikes, at the expense of losing control over it and some privacy. If you want to keep it all in house it is better to use something like EmonCMS.
Multi-day energy use graph(uncalibrated)