After a spate of high electricity bills and trying to save energy by turning things off randomly I decided to do it the proper and scientific way by experimenting and collecting plenty of data.
In the days of
bitcoin mining high energy bills were the norm. Now they miners have all moved to better homes and I am left with myriads of run of the mill appliances. Identifying the energy hungry beasts is not trivial.
 |
| Initial attempt at current measurement with DSO-Nano |
The
Open Energy monitor site has a plethora of ideas and some quite good Arduino and Raspberry Pi based designs for energy monitoring. SeeedStudio also has a couple of designs intended for
energy monitoring use with an option to use an LCD or Oled screen, which I quite like. The downside of both these options however is the wireless component. The EmonTx option uses the
RFM12/69 as the wireless transciever and the SeeedStudio option uses the
nRF24L01+, both options require
custom and
expensive receiver hardware attached to an always on data-logging system.
 |
| Seeedstudio Energy monitor with nRF24 |
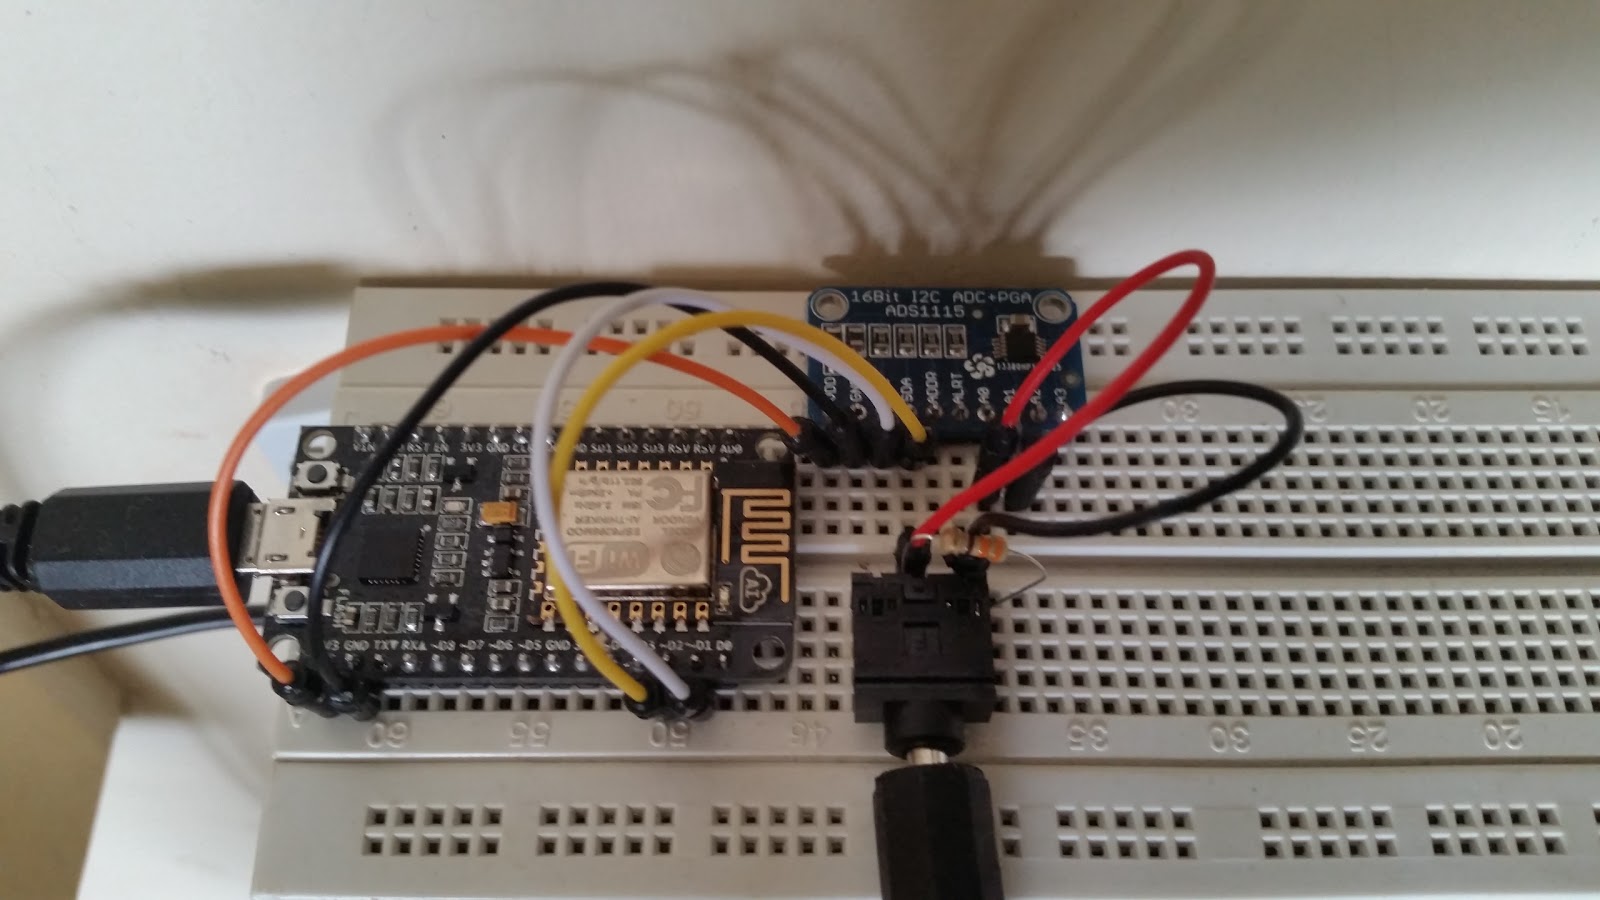
So after a bit of research I decided to roll my own on a breadboard using the ESP8266-12E based
NodeMCU module. I started with a basic version is for apparent power only. To keep component count
low and the circuit as simple as possible I used an
ADS1115 breakout in
differential mode eliminating the need for bias resistors. The hard part
is getting a licensed electrician to wire up the clamp on current
sensor to the main wire coming into the premises. Since we have only 1
channel we are going to monitor overall power rather than power per
circuit.
 |
| Apparent power energy monitor with ESP8266 |
After the fact I made a Fritzing diagram showing how-to wire up the prototype on a
breadboard. Powering the NodeMCU near the switchboard might be an issue
as well, so I installed a
DIN rail power socket, this will come in
handy for real power measurement later on.
 |
| Fritzing diagram of apparent power energy monitor |
One of the downsides of the ESP8266 approach however is the high current consumption (300mA or so) of the module and the fact that small block transformers used for voltage sensing will experience
power factor shift under this load. This makes powering the system and measuring real power using the same transformer difficult, it can however be done with proper calibration.
 |
| NodeMCU Energy Monitor including power supply and voltage sensing |
The next bit is getting proper code to run on the NodeMCU. I chose to use the module in Arduino mode with the excellent work done
here. For code inspiration I used
Emonlib from the OpenEnergyMonitor project. I made some changes to read the current via the ADS1115 instead of directly via the inbuilt ADC, increased the integration period and patched in a square-root approximation method. The resulting code can be seen below.
. This makes it easy to plot graphs and analyse the data for appliance specific spikes, at the expense of losing control over it and some privacy. If you want to keep it all in house it is better to use something like
.