Showing posts with label beagleboard. Show all posts

Sunday, November 18, 2018

The Red Light - Competition entry with BeagleBone Green

Riding in Adelaide especially during night can be a hazardous activity. You have to share the road with cars and pedestrians, staying safe from the former and keeping the latter safe. Avoiding pedestrians requires vigilance from the cyclists, but the attention of cars has to be drawn with bright lights. Often due to circumstances you might need to ride in the middle of the lane or cut across lanes to make a turn. During the day these activities are indicated with a hand signal, I made this project to translate those to bright lights controlled by your motion and muscle activity to obvious signals during the night.

NOTE: This is a cross-post from Hackster.io - https://www.hackster.io/whatnick/the-red-light-beaglebone-myo-controlled-bike-lights-6c50d2 


Various light options tested with data from serial port

The controller used in this project is Myo Armband - it contains a 6 DoF IMU and 8 EMG sensors for muscle activity. The controller communicates to the BeagleBone via a BlueGiga BLE dongle, this appears as /dev/ttyACM0 on debian based images. The raw data from the sensors is processed using Scikits Learn and an NN-classifier to interpret the rider motions. The turn and stop activity is then passed over to a realtime controller (either the BeagleBone's native PRU or an external microcontroller like the Teensy) to drive a WS2812B LED matrix.


Data stream from Myo controlling LED Matrix

The BeagleBone Green is modified to add a JST connector to activate the on-board battery charge management system to use a Lipo for poweing the bike lights according to this how-to. See the images below for details of this modification.

The whole system is wearable and battery powered. The LED matrix is stiched onto a high-vis jacket, a must for any night time riding and the Myo is placed around the fore-arm before starting the ride. Here is a video of the lights in action linked to gestures.

Testing gestures and linked lights


The Details

Install git on BeagleBone Green and sync the date using ntpdate. Then checkout my repository.
Plug the Myo Blue Giga receiver in and check that it is recognised
lsusb
There should be 3 usb devices. The BeagleBone Green may need to be powered over USB instead of battery for the USB hub to power up and recognise the module.
Install the dependencies for myo-raw.
sudo pip install -r requirments.txt
The myo-raw can also be installed under Windows  or any other desktop environment to stream the data from the BBG and display it remotely.
Run myo_raw_osc with the following command to stream data to remote server, print locally and send results from EMG sensor to external LED panel controller (in my case the Teensy, however I am also experimenting with the PRU's)
screen -dmS myo python myo_raw_osc.py -v 1 -s 1 -d [x.x.x.x,7110] -c 2
This will output controller codes to the Grove UART port /dev/ttyO2 to the display driver in sync with arm motion. A bit of looking at the experimental data and tweaking of the classifier may be needed to get it set to you movement patterns.
That's it for the setup on the BeagleBone Green in the non-PRU mode. For the Teensy, clone the git repository as below.
Install the Teensy add-on for the Arduino IDE as described here and upload the code to the controller. The LED matrix data pin is connected to pin 2 of the Teensy and the BeagleBone UART is connected to Hardware UART1. I power the LED matrix from the 3.3V output of the Teensy rated at 100mA, this allows safely connecting the 3.3 output signal to this particular matrix. Larger matrices may require buffer IC's and separate power supply. The BBG 5V system pin is connected to the VIN pin of the Teensy for power supply off the battery/USB OTB connected to the BBG.
That is all for the set-up of this simple but very useful project.

Thursday, December 14, 2017

Sense Energy monitor teardown - sampling in MHz

Recently I obtained a Sense Energy monitor via US from Margaret of BitKnitting. She is doing a very interesting neighbourhood energy efficiency project. As usual I could not contain my curiosity and opened it up to have a look. I will start off with an analogy - the closest bit of open-source kit that I have to do half the amount of analog functions as the Sense is the PRUDAQ on the BeagleBone wifi as pictured below.
Beaglebone Wireless + PRUDAQ
The case is very well built from high density plastic, however it is clipped together neatly and easy to take off without permanent damage. The wifi antenna is screwed on with a neat water sealed connector. The power/voltage and current sampler connectors are Molex Microfit and Nanofit respectively. I rather liked the Molex Nanofit and adopted it for my own DIN Rail sampler board.
Enclosure and main boards
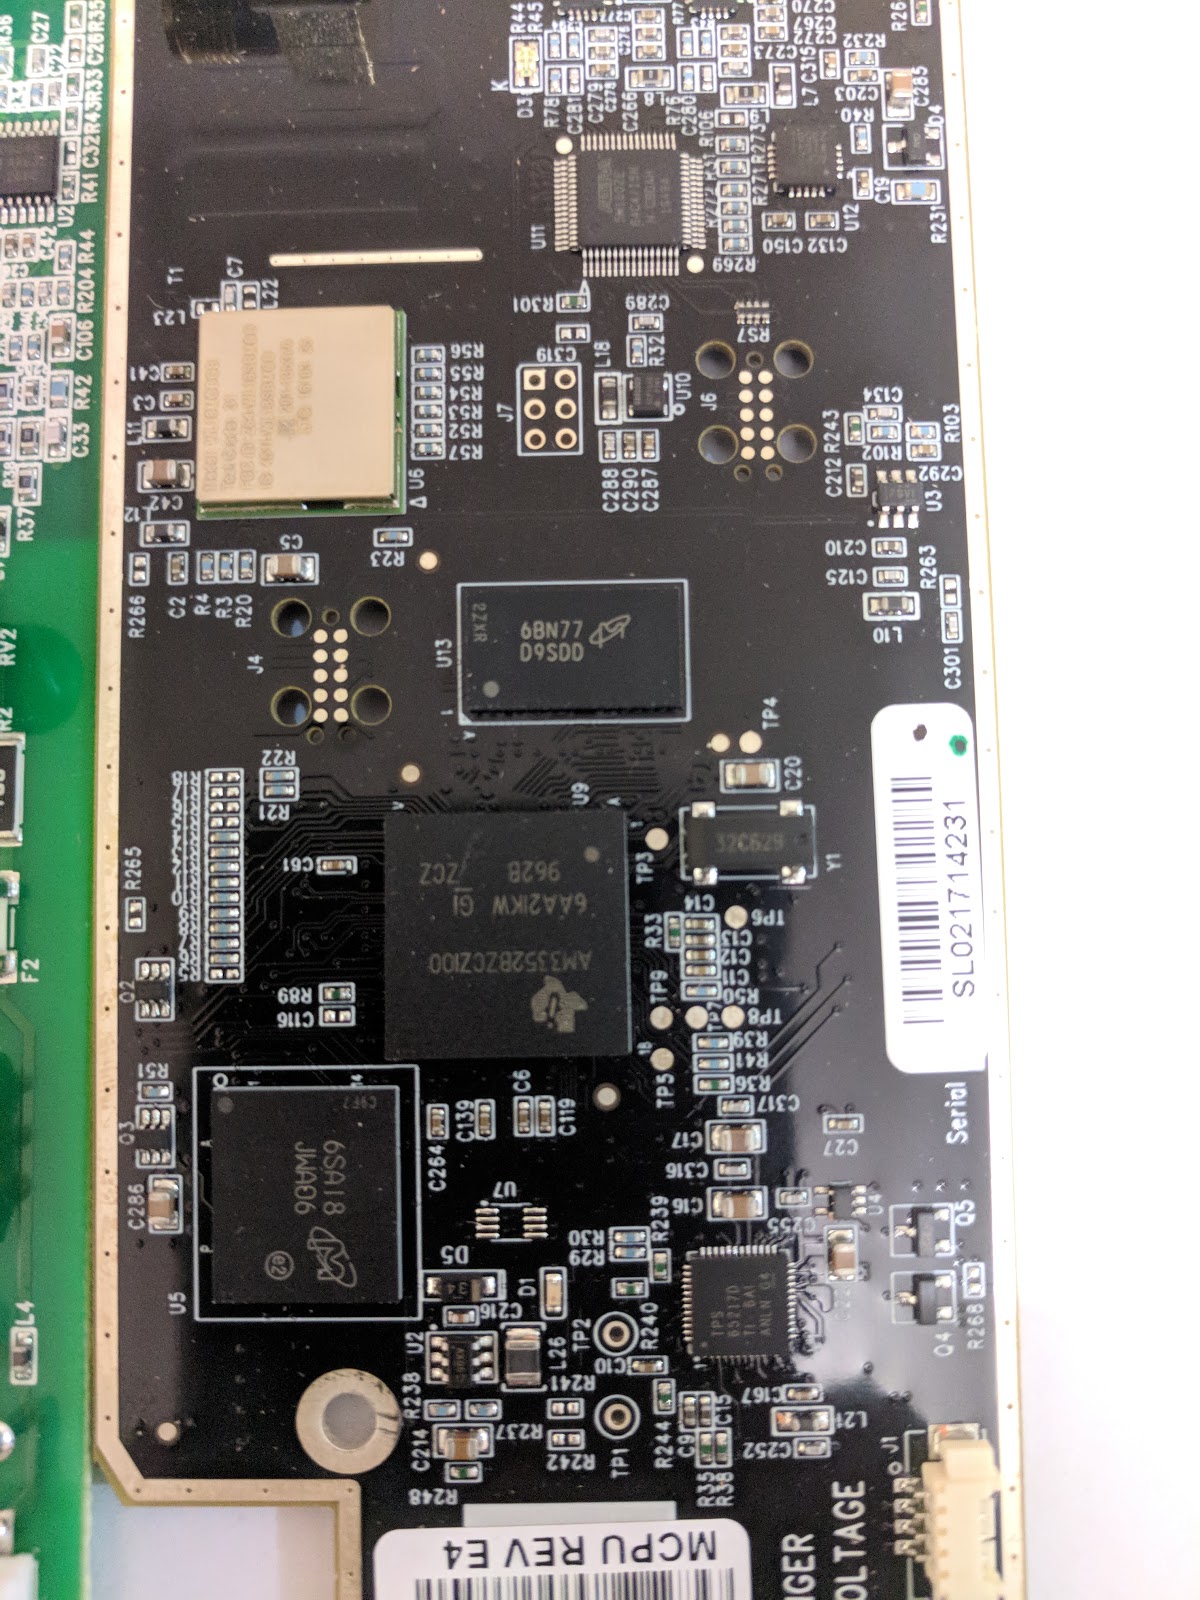
Inside this very nice exterior are a couple of very dense sandwiched PCB's. One is Green, almost a generic power supply board, but with additional function to sample the split phase AC in the North American grid. The other is a black board where the magic happens. It is essentially a beaglebone wireless with a custom energy monitor system put together using high-speed ADC's and a CPLD
Green Power board, Black Digital+Analog board

Main PMIC, same one is used on the BeagleBone Black
The image below shows the subsection that performs energy measurements, it is composed of x2 high sample rate ADC's (14bit 2MSPS) and an Altera Max V 64pin CPLD. I assume the cells inside the CPLD perform the reading from the ADC's and multiplication/accumulation to compute energy usage, then transmit computation results to the TI CPU.

Custom energy monitor with high-speed (2MSPS) ADC's and Altera CPLD

Wifi Module
Switcher IC's on power supply board

The main CPU is a Linux compatible AM3352 CPU from TI. It does not have a PRU co-processor like the one used on the BeagleBone, hence the need for a CPLD to perform some of the real-time computation required.
TI Arm CPU and RAM/Flash

Overall the Sense energy monitor hardware is a great design, though a bit specific to the USA market. I am looking forward to a release in the Australian market. The purchase to study one was certainly worth it. Now off to install my own linux build on it and send the data elsewhere.

Thursday, December 25, 2014

Reflow oven controller with Multimeter and Arduino

After a few boards I got sick of soldering 0603 components using a soldering iron and started looking into using solder paste and hot air. I bought a hot air rework station from Rhinotools. It looks nice, but is rather noisy to use, and I find myself going for the iron always instead of the hot air gun.
The next step in the soldering tools exploration was a classic toaster over reflow. The boards I usually solder are rather small and not panelized, so I do not need a large oven. The smallest decently built oven cheap oven I could find was a K-Mart Homemaker 14L model with 1300W heating power. I also backed an Arduino Leonardo based reflow controller on Kickstarter - ControLeo2. While waiting for the controller to arrive from the US, I got itchy fingers and started hacking together a controller from bits I had lying around.

The ControLeo2 is impressive in being a 4 output reflow controller, to fully utilise this I ordered 4 cheap Fotek relays. They are rated at 25A, and the elements in the toaster consume about 3A each, so there is plenty left over. I would have liked to get a Crydom relay, but they are rather expensive. There is plenty of space in the controller compartment to fit all the 4 relays in, what I will control with them is another matter. Only 2 are needed to control this particular oven as it stands, 1 for the top and 1 for the bottom. The other 2 are planned for the booster element and a cooler of some sort.

Mounting the relays in the case requires some angle brackets, I found these at Bunnings which exactly fit the holes in the SSR with pre-drilled holes. They are galvanised steel however, not the best for heatsinking relays, but they are a good start. I am going to make some proper brackets with bent aluminium bars, but that can wait.
The initial controller was built using the BeagleBone GPIO's. There is the popular Adafruit GPIO library, but I used the less widely used PyBBIO since it has an included reflow oven controller code. My fork is modified to read temperature from a Digitek 4000ZC multimeter over the serial port using the FS9721 python library. A lot of multimeters, including some of the UNI-T models use this controller, so the adaptation should be useful for anyone with this multimeter at hand and not necessarily a MAX31855 breakout board. The SSR's are wired to the BeagleBone GPIO's via a ULN2003 relay/solenoid driver I picked up at Jaycar.
The BeagleBone arrangement though quite nice lacked a few features in the existing code, particularly support for curve editing and proper PID control. So I looked into another Python based toasterReflow controller - picoReflow. This one has even snazzier GUI and lots of options to create new curves and calculate cost in cents per reflow. I decided to try something different this time and replaced PyBBIO using my Arduino's GPIO capability, since a lot more people probably have Arduinos compared to BeagleBones and Raspberry Pi's. So my EeePC replaced the beaglebone as the main controller, taking in the readings from the DMM over 1 USB port and feeding out the SSR control signals to the Arduino over another USB port. This closed loop looks something like this:

Oven -> Thermocouple -> Digitek 4000ZC -> EeePC -> Arduino -> ULN2003 -> Fotek Relays -> Oven

Overall this works quite well for me and I hope it is useful for someone else attempting to build an oven without a fancy controller with just the bits at hand, yet achieve a nice controlled profile.

Sunday, May 1, 2011

Making wheel under the cameras - Beagle has 4 wheels

All the work with stereo vision and kinect hackery is of not much use without obstacles to sense and avoid. Hence the beagleboard is now mounted on 4 DC motors driven by the DFRobot Arduino Romeo board. The robot base is quite sturdy aluminum and has plenty of pre-drilled holes, but to mount the beagle I had to acquire my first rotary tool set.

Stereo vision robot taking shape I wish the wireless drivers on beagle were easier - ralink 2870 meh

ASUS is coming out with the PC version (Xtion PRO) of Kinect soon, which will be smaller than the original and will not have the RGB camera, it will also be purely USB powered. Perfect opportunity to use it along with the stereo vision cameras to increase the depth of field and build a platform which can use vision indoor and outdoors and in complete darkness, by combining the sensors.

Next comes getting data from the camera out wirelessly with sufficient bandwidth. I have the Beagle working with 3G modems, but this was going to be a first with a Ralink 2870 (which I got el-cheapo at DealExtreme) . With Koen's advice I decided to use the rt3070sta, the modinfo makes is obvious that this is going to work with the card:


root@beagleboard:~# modinfo rt3070sta
filename:       /lib/modules/2.6.32/kernel/drivers/net/wireless/rt3070sta.ko
version:        2.3.0.4
license:        GPL
description:    RT2870 Wireless Lan Linux Driver
author:         Paul Lin


It does not like pumping dhcp at boot time so I have to go the long way and pull it up with ifup later on. The usual gstreamer tricks work fine for sending the camera streams around:


In the beagle - gst-launch v4l2src device=/dev/video1 ! queue ! videorate ! video/x-raw-yuv,framerate=15/1 ! videoscale ! video/x-raw-yuv,width=320,height=240 !  ffmpegcolorspace ! jpegenc ! udpsink host=x.x.x.x port=xxxx

In the laptop - usr/bin/gst-launch udpsrc port=xxxx ! jpegdec ! autovideosink

Next comes pan-tilt and actual object avoidance and object following. Pass the dog a ball.


Wednesday, April 6, 2011

Expanding the Arm-AVR menagerie (Training Pandas)

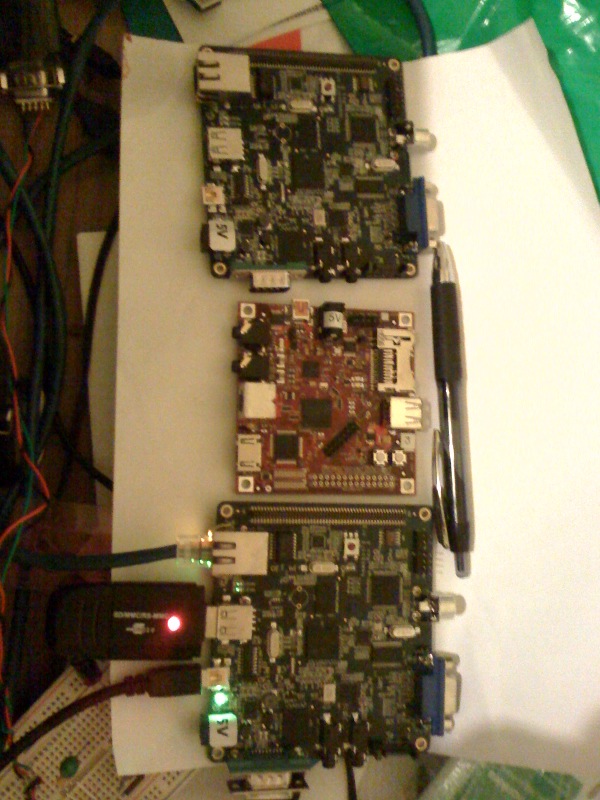
I have recently acquired some more hardware - a Tincan tools Trainer for xM and a Pandaboard. Sometimes I feel embedded should start with an 'A' - for ARM and Arduino.

Word of caution in the new kernels the serial ports on the xM appear at /dev/ttyO1. Look in /proc/tty/drivers - OMAP-SERIAL  /dev/ttyO     253 0-3 serial.

You will need this little tid-bit to program the trainer. The programmer seemed to be atleast respond to avrdude when fresh out of packaging:

avrdude: stk500_getsync(): not in sync: resp=0x20avrdude -V -F -c stk500v1 -p m328p -P /dev/ttyO1 -b 57600 -U flash:w:blink.hex

avrdude: stk500_getsync(): not in sync: resp=0x20

It was not working anyway, but can I make it fail with 0x20 predictably ? So I got fancy and forwarded the serial port over the network. The beagle acts as a serial port server and the host machine acts as the client. This is plain tcp, but you can build an ssh-tunnel or whatever. The serial port is redirected with interceptty. The same failure was observed.

The embedded platforms menagerie, and Avrs thrown in

So I forked out some cash and got myself an ISP cable. This let me load the arduino bootloader using avrdude and the instructions here. After the first bootload, avrdude and avrgal can both push blink.hex to the arduino bootloader, but fail to perform further writes due to the lack of the software reset (stty -F /dev/ttyO1 hupcl). So I resorted to how the arduino visual IDE does things and eventually I used the Arduino.mk in /usr/share/arduino and built up a blink.hex which was significantly larger than the pure Makefile based one. This one supports loading and reloading via avrgal. The first attempt made an arduino bootsector virus as av500 put it.

Now that all is hunky-dory in the tincan + beagle-xM world, it is time to attach a few peripherals to the arduino and watch it squirm.

Friday, March 11, 2011

Kinect + BeagleBoard-xM (now need GLES)

My shiny new BeagleBoard-xM arrived a few days ago. I have been too snowed in with OSGi to spare it some time. The test image on the supplied SD card boots fine, but I have grand plans for a slamming robot vehicle which will require more goodies (probably eventually ros).

It has become even easier to get started with kinect and beagleboard thanks to the inclusion of libfreenect master in angstrom. It can be almost plug and play.

    #beagleboard xM now works fine with kinect + opencv just need gles demos
  1. Install non-ramdisk angstrom. From windows the easiest way to get started is to download and SD image Koen graciously provides and burn it on top of the test image supplied with the board. As expected a few hiccups with the image writer but nothing a downgrade would not fix.
  2. Install libfreenect directly (opkg install libfreenect) or grab git/cmake etc. to build from source. Even when building libfreenect from source, having libfreenect-dev installed is handy since it fetches all the other headers needed.
  3. Make an OpenCV based demo, the standard demos don't work so well because the Beagle video driver lacks GLX. Need some more packages opencv, opencv-dev, compilers and whatever else. The building required a few symlinks for compilers and opencv libraries since I was compiling on the beagle itself rather than cross-compiling from oe.
My TinCanTools xM trainer board with its Arduino will be arriving soon. The idea is to get a couple of servos and probably even a mobile robotics platform to start building an indoor track and shoot platform, with some slamming and co-operative map building thrown in. If anyone is interested in building a GLES client for the Kinect on the BeagleBoard let me know.

Tuesday, January 18, 2011

Starting work at CSIRO - after a long holiday

It was been a great December and January. We have seen a lot of Tasmania, gone for a few great walks - 5 hour Freycinet loop and few hours up Mt. Wellington. I have made some progress on editing a chapter and lots of progress on making a connection sharing point for multiple USB modems on my BeagleBoard (not that the USB-Ethernet hub can sustain the juice multiple modems draw).

The key ingredient turned out to be the udev rule to automatically insert the modem driver (good old usbserial) when the device was detected on the usb bus:
ACTION=="add", SUBSYSTEM=="usb", MODALIAS=="v05c6p0015*", RUN+="/sbin/modprobe usbserial vendor=0x05c6 product=0x0015"

Beyond this the nm-connection-editor tool (from the NetworkManager coterie) was used to add a Vodafone connection with the relevant APN. Now whenever the modem is plugged in ModemManager kicks in and a ppp connection is established without any more fuss.

First day at the new office in Csiro , ip phone and cove in the alcove
First couple of days at CSIRO have also gone swimmingly with a lot of help from my peers (Gary mostly). I spent sometime reading manuals and doing design decisions with GeoAPI. Got indoctrinated into the CSIRO way and spent sometime staring at stack traces from SAP. Otherwise I am really enjoying the shiny new Mac with lotsa RAM, time to kick around some shaders in WorldWind.

Wednesday, December 8, 2010

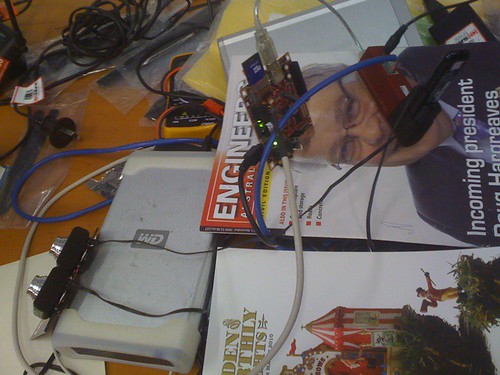
Beagle has 3 eyes - Kinect + Beagleboard

People have hooked up the Kinect to a few embedded platforms - Intel Atom and Gumstix Overo have come up. It was time for the other darling of open development, the BeagleBoard to talk to the Kinect. I have done stereo on the beagleboard before. The kinect makes things a lot easier.


First the usual step of getting libfreenect going, I ended up using unstable since it includes the OpenCV bindings. The sync API is much more stable than the callbacks and has fewer frame drops. Since I don't have a spare keyboard/mouse set for the Beagle and Synergy refused to co-operate, I did a demo frame viewer run with OpenCV rendering the frames. I had to upgrade opencv, ffmpeg, libusb, cmake and bunch of things on Angstrom, then replace CMake opencv detection with pkg-config to get everything working.

#kinect tested to work with #beagleboard and opencv #openkinect
Meanwhile there have been some major changes in the OpenKinect world with PrimeSense releasing the OpenNI framework. This releases the Microsoft stigma from the Kinect and encourages more open source development of applications. You can grab the OpenNI code from Github and build on your platform a from the manufacturer kinect driver. No stigma about a hacked Kinect (or shall we say PrimeSensor) any more either, it is officially open.

Wednesday, September 29, 2010

Testing a new modem with BeagleBoard - DIGI Net Mobil

I broke my old Prolink Modem by walking around while it was plugged in and twisting the USB plug. I got a newer 7.2MB capable modem from Deal Extreme. Plugged into the beagleboard it shows up as a CD as expected and I ejected it to get the ttyUSBx devices. Unfortunately on the first try none of them wanted to respond to AT commands, it only started working after I installed the driver on windows and connected it up. A throughput test shows that it is working slightly better than the 3.6Mb/s Prolink promises.

Usual diagonistics on Linux shows:
lsusb - 05c6:0015 Qualcomm, Inc.

ATQ command works and dialing proceeds then I get stuck in an Unsolicited Message Block ("+ZUSIMR:2") using the ModemManager/NetworkManager Combo.
#beagleboard making friends with new 3G modem, first outing
ATI gives: 
Manufacturer: BMC INCORPORATED
Model: HD360
Revision: W1MV1.0.0B20100128 W1MV1.0.0B20100128 1  [Sep 4 2008 12:00:00]
IMEI:
+GCAP: +CGSM,+DS,+ES


Not much but at least a start for digging.

Thursday, June 24, 2010

BeagleBoard Stereo Camera on Flickr


A while back I made my BeagleBoard dual-USB stereo camera. Gstreamer is set to capture single frames in this mode and no video synchronization etc. is performed. Gst-Opencv is now installed on the beagle and I might try chaining in some colour detection, but I will wait this opencv-dsp comes along. Getting the images out of the board over scp/sftp was proving to be a pain, so I decided to install a flickr upload script in Python. Apparently the same trick can be done using cUrl with this REST endpoint, but it did not work out too well for me. The USB wireless modem from yesterday works as a perfect network link to push out the images captured by webcams.

Now I can produce unlimited amounts of stereo samples on Flickr for people to compute disparity maps. I will also put on an IR filter on one of the cameras and try capturing some 4 channel images at a distance where the perspective is not such an issue.

Wednesday, June 23, 2010

Introducing the Dog to the world - Prolink PHS101 modem on BeagleBoard

I seem to have sprouted an impromptu holiday to Fiji. So tonight ended up a rush in completing my papers for IGARSS 2010 in Hawaii. Time has passed so very fast. Some of my colleagues who started their PhD at the same time as me have written 1/3 of their thesis already. I in my turn have been distracted by life and side projects, but overall the extra curricular activities have made my PhD life much much more interesting.

While copy pasting content from my original draft into the conference template I decided to have another look at the tricky dual-device USB based 3G modems. The Prolink PHS101 is plugged into the BeagleBoard and appears as a pesky CD device on /dev/sr0, you can use mount -t iso9660 /dev/sr0 to access this device. The newer kernels fortunately and unfazed by this, using eject /dev/sr0 gets rid of the CD device and loads up the usbserial driver with the right vendor options to make it appear as 3 serial devices on USB. I did not have to use usb_modeswitch, though I managed to native-compile and install it on the beagle.

Only 1 of these 3 is a functional internet device. In Australia the wvdial.conf to make use of it looks something like:

Init2 = ATZ
Init3 = ATQ0 V1 E1 S0=0 &C1 &D2 +FCLASS=0
Stupid Mode = 1
Modem Type = Analog Modem
ISDN = 0
Phone = *99#
Modem = /dev/ttyUSB0
username = username
Password = password
Dial Command = ATDT
Baud =460800
Init4 = AT+CGDCONT=1,"IP","vfinternet.au"


Then I hit another brick wall, there is apparently an issue with wvdial which prevents it from working on arm based platforms. Modem-Manager and NetworkManager can be tasked into filling the hole left by wvdial. A bit of snooping with AT commands and ModemManager shows up the Qualcomm heritage of the chipset.

root@beagleboard:~# microcom /dev/ttyUSB0
ATI
Manufacturer: QUALCOMM INCORPORATED
Model: C-180
Revision: 120016_062_001         1  [Feb 09 2010 23:45:26]
IMEI: 358093021714293
+GCAP: +CGSM,+DS,+ES
OK


 Wonder how soon I will be able to connect up using this.

PS: After finishing off my IGARSS papers I finally managed to get it going with  a melange of dbus,nm,mm and pppd. So this modem officially works on the BeagleBoard, hurray!!

Sunday, May 23, 2010

Going big and going small - AWS and Matlab for Beagleboard

Last night I had a bit of a stroll along the Amazon EC2 alley. Started up a Lucid instance and checked out orfeo toolbox into it for build testing. Nice and easy, except for bits with private key setup and such. But I have gone through password-less SSH with beowulf setups and even more recently using a Launchpad account, went through that completely unfazed.

Next stop was setting up a few Hadoop nodes and running a scripted word counter using Pig. I left the nodes running and racked up 80 equivalent hours, now to wait for the bill. Once the I figure all this out I will attempt run more parallel tasks using Java native features like JAI and the Orfeo Java bindings. Twitter seems to use Hadoop with native libraries performing compression - LZOP. Interesting point about parallel tasks being data bound, parallel image processing tasks given sufficient CPU resources should then work faster on block based compressed formats such as JPEG2000. Just need sufficient resources to test this out. Perfect use for EC2.

Then I went small and looked at the awsome work Mathworks is doing in leveraging open-source to add value to their product which is heavily ingrained in the engineering world. In the process they have made a fair few Eclipse enhancements which all of us can enjoy - Target Support Packages. With all this work developing a quadcopter control using the beagleboard might just become a join the dots project.

Saturday, May 22, 2010

Arduino + Beaglebord + Other bits = Autopilot

So I have had a minor set-back with the el-cheapo motors on the quadcopter. No surprises there. Time to chin-up and get better motors and start building the second iteration. This one will feature stereo vision, barometer and the razor imu for positioning instead of the 3DM GX2. I am about to test the beagleboard to arduino connection over i2c, I will have to ensure that I attach some level converters this time to isolate the 2 voltage levels and have reliable operation.

I think the razor IMU will start life hooked to an Xbee and strung down from my hand flown co-ax. It is much lighter than the microstrain box and the little heli should be able to lift it. Both the xbee and the razor operate at 3.3 volts so no level shifting needed, the heli seems to provide some 4.2 volts which is rather odd for a lipo pack.

Helping with the lift calculations is this little tool. With a 1400kV motor i can turn bigger propellors and possibly prevent burn-outs. Better order some more el-cheapos with ESC just in case the controller is toasted as well.

Saturday, May 8, 2010

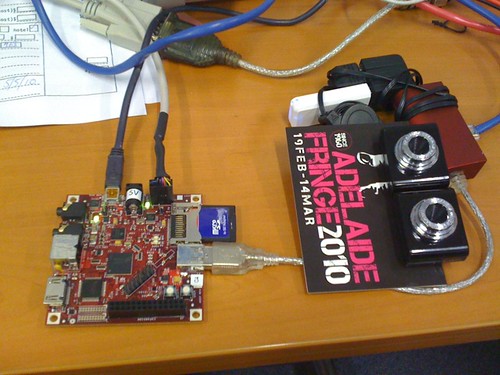
The beagle has 2 eyes - OpenCV Stereo on BeagleBoard

I have the ambitious aim of allowing my Quadcopter to see in stereo. So recent tests are being conducted of a suitability of on board stereo processing via OpenCV. So far the unoptimized version of OpenCV makes this really slow and impossible to do in realtime. I just got the last day of author registration in for IGARSS as well, I hope it was on time.

Some USB devices arrived from deal extreme - USB GPS running at  1Hz / 38400 baud and a Ralink Wireless-N dongle which does not have prebuilt drivers in Linux or atleast not one that autoloads with the USB device. I will investigate the wireless later but for now it frees up a slot to try out stereo - so here is the rig.


The gstreamer capture and opencv stereo_match both work as expected and it takes about 300ms to grab frames and 12300 milliseconds to form the disparity map with default settings. Much can be improved in the opencv front to reduce the time required for processing. As a comparison my laptop using the same set of tools - Gstreamer for windows with the ksvideosrc as frame source and OpenCV 2.1. The frame capture speed was 250ms and the disparity map was produced in 300ms.


So a realtime stereo vision based quadcopter may not be possible, but data capture and indoor map building with post processing is definitely feasible. I got a quote for the Hokuyo laser scanner, though significantly more expensive than the stereo rig ( few hundred thousand yen) it has larger field of view and more reliable point cloud production independent of features on the target surface.

Monday, April 26, 2010

Making the BeagleCam - frame processing for objects

After a bit of fiddling with opkg - opencv samples were installed. The plan is to make an office behaviour analysis system with a hallway camera. The school already has several surveillance cameras but I can't really get to them, but I did make a javascript based frame-by-frame loop for this system.

After testing the opencv samples for a bit I realized that a filtered image stream can be very handy in saving processing and storage. The idea is to utlize gstreamer chaining to slot in an openCV facedetect module and save only frames where face is detected.

I can currently capture timestamped frames using gstreamer:

gst-launch v4l2src num-buffers=1 ! video/x-raw-yuv,width=640,height=480,framerate=30/1 ! ffmpegcolorspace ! jpegenc ! filesink location=$(date +"%s").jpg

Then I can use OpenCV peopledetect and facedetect in the chain with queued up frames and start saving once the detection starts producing output frames. This will greatly reduce the amount of boring hallway frames and the board will concentrate on processing interesting events i.e. people approaching the camera. This can then be used for interesting data mining work such as time spent in the office, walking speed, hallway meetings between colleagues and number of days without changing shirts.

Time to ensure the gstreamer opencv module works properly on beagleboard.

Saturday, April 17, 2010

Faking Earthquakes - Live IMU data

Adelaide had a very small tremor on Friday and the "scientists" are using statistics to say a stronger one is on the way. Well that is cause for concern indeed, let's get paranoid and install personal seismographs in all our houses in addition to the bushfire, flood and tsunami alert systems.

At this week's hackerspace I tried to stabilize the video stream from the BeagleBoard and push it out to the web via gstreamer, with limited success. I was recommended to use FluMotion. I will push out over USB net from the beagleboard, aggregate on a secondary server and publish via flu. Still kernel lockups when reading the webcam are annoying.

I also finally managed to get the 3DM-GX2 reading done with Python-Pyserial. This provides fun ways of automated testing on the rig i.e. measuring mechanical properties by driving the motors with certain speeds while talking to the Arduino on serial and recording IMU data. I have both logging and live display working. The live without caching has lower sampling speeds since I haven't threaded the sampling separately from the display, but at least the graph updates as I move the IMU about. So here are some pylab plots.

Note the red curve settles at -1g, this is equal to the gravitational acceleration. Wonder what it will record at high altitudes. May be it can used as a gravity based locator system in GPS denied under-water scenarios. The live graph uses a wxPython backend for matplotlib and samples very slowly.

Final word - with proper sensitivity and stable mounting points you can build yourself a seismograph with an IMU.

Wednesday, April 7, 2010

HackerSpace Adelaide - Flying Crates and Hawkboard Screen

Today at hackerspace we got carried away a bit with helicopters. There were attempts to even get a crate to fly. Instead of flying the crate nudged along the ground. By the end of the night the radio control had come out of the said helicopter and the motor controlling PWM was being viewed on an Arduino oscilloscope.

We also managed to get the Hawkboard up on a VGA monitor and all the way to showing the Ubuntu login screen. We are planning to pool and buy a few more HawkBoards, everybody is dreaming up stuff to do with them. I have mentioned RADAR on a small UAV before, now it seems to be a real possibility with the ISEE RADAR. Time will come when there will be drones flying around giving out speeding tickets.

Wednesday, March 31, 2010

Dog and Birds - Hawkboards and BeagleBoard

The HawkBoard costs about 1/2 the price of a BeagleBoard, only on special though. So I killed 2 birds with 1 stone and got 2 of them from Special Computing and 1 BeagleBoard from DigiKey.


They both used $30 delivery mechanisms - UPS Express Saver and USPS International Express. The postal service beat the courier by a day since the courier does not deliver to the remote areas every day.

Anyway everything is finally here and the hawkboard is the easiest to get started with since it has an on-board serial connector - no soldering needed. I got Ubuntu installed with this guide and the following modification:

1) Load the kernel using - bootp 0xc0700000 [ip]:uImage
2) Slight changes in bootline – added mem=128M
3) bootm from 0xc0700000
4) The global chmod 777 prevents you from using sudo. You need to chmod 4755 on /usr/bin/sudo and 440 on /etc/sudoers.
 
Otherwise ubuntu jaunty just works and I even have my favourite Python to play with on the tiny board. Nothing of this form factor has afforded me this pleasure in the past. Next step is to install some components of ROS on it and start building the LocalHawk - localized UAV version of the GlobalHawk.

Sunday, March 21, 2010

Living in the LiveCD - Frugal Linux

The openembedded huge bitbakes were running uncomfortably slow in the virtual machine. So I decided to install linux on USB and take it from there. The Karmic installer unfortunately put grub on my Vista boot disk while I wasn't looking , what a naughty koala.

So I do have BootRec to fix the boot sector on my Windows recovery CD, just for the kicks and performance feel I decided to live in the liveCD instead. I have a couple of build VMs on the windows drive, I installed virualbox and started up some VM's for persistent work. The virtualbox booted at least 4 times faster than in windows, they must have done some nice optimizations in the linux build.

The verdex new kernel build is going very very slowly. Since bitbake is based on Gentoo portage and I have done Gentoo stage 1 installs, from experience this will take a whole day or so. I hope I don't have to repeat the same experience with the BeagleBoard, since there is a prebuilt ubuntu distro from the arm port. At least the beagle-board is much cheaper than the Gumstix and the shipping is tolerably inexpensive. Now the very competitive HawkBoard is also in the market.